If you’re a website or software developer that usually hosts your project on the Droplet of DigitalOcean and when it gets over you will want transfer the ownership of the droplet to client, right?, but how do you do this?
Or in other case, you work in a team and wanna transfer your current droplet to a member inside team to get the support for your difficulty problems, but you really don’t know how to do this?
So in this tutorial we will explain how you can transfer/move/migrate a droplet from one DigitalOcean account to another. There will be 3 steps in the guide and you should do exactly step by step in order to ensure your data safety.
Step 1: Create a snapshot of your droplet
First of all, we need to power off the droplet first in order to ensure all applications have written out their data to disk.
To power off your droplet, let login to digitalocean control panel and click the Droplet name, then click the Power option in the left menu and power it off.
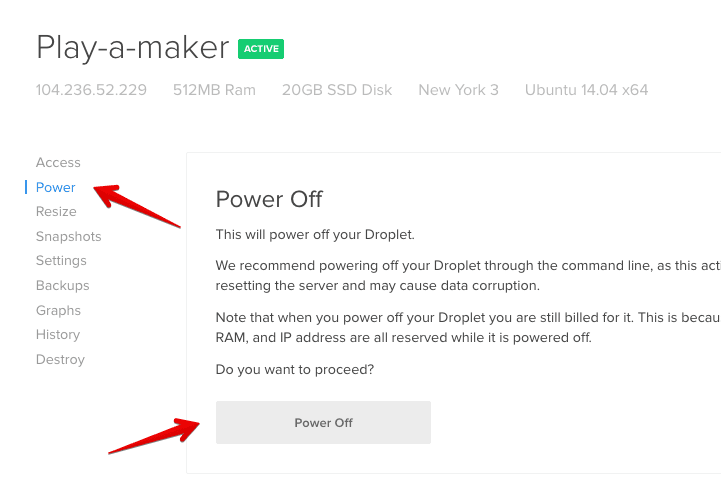
Or you can use the command line: sudo shutdown -h now
Now click the Snapshots link from the left menu, choose the droplet you want to transfer and enter the name of snapshot. hit Take Snapshot button to create one.
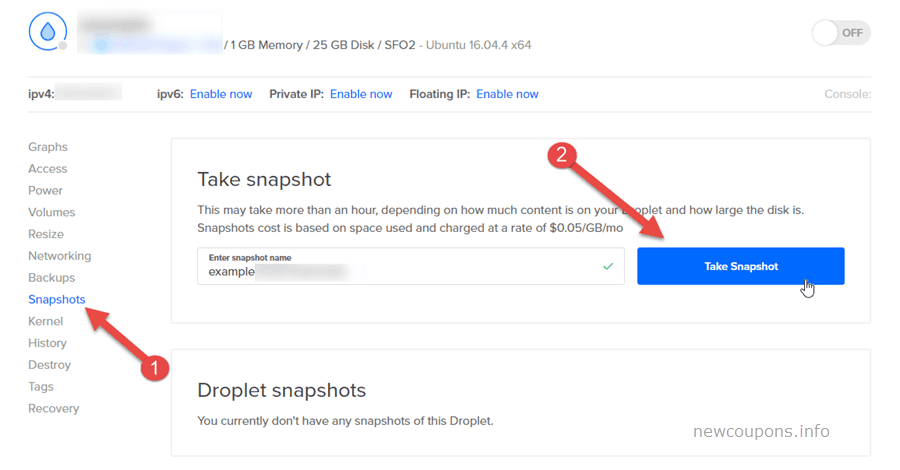
Once done you will see the Snapshot listed along with any other previous Snapshots.
Step 2: Transfer snapshot to another user
Now you have already a snapshot of your current droplet, let’s start transferring it to another account.
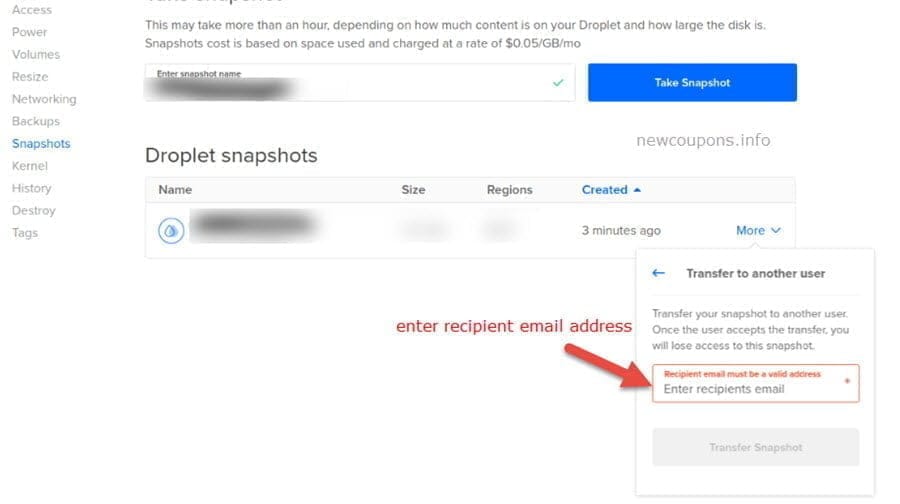
At the Snapshot screen of your droplet, open the More menu of the snapshot and select Change owner.
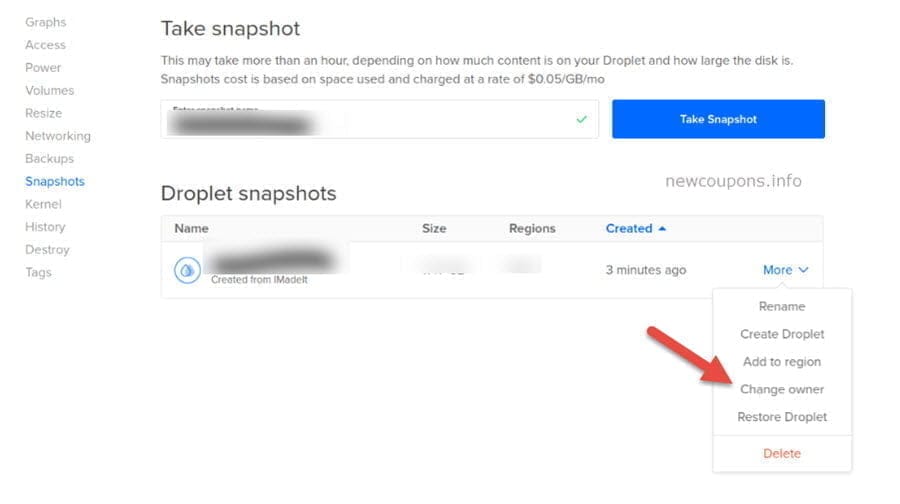
Then you write the email address of the account you want to transfer snapshot to, then hit Transfer Snapshot. It may take several minutes to be done.
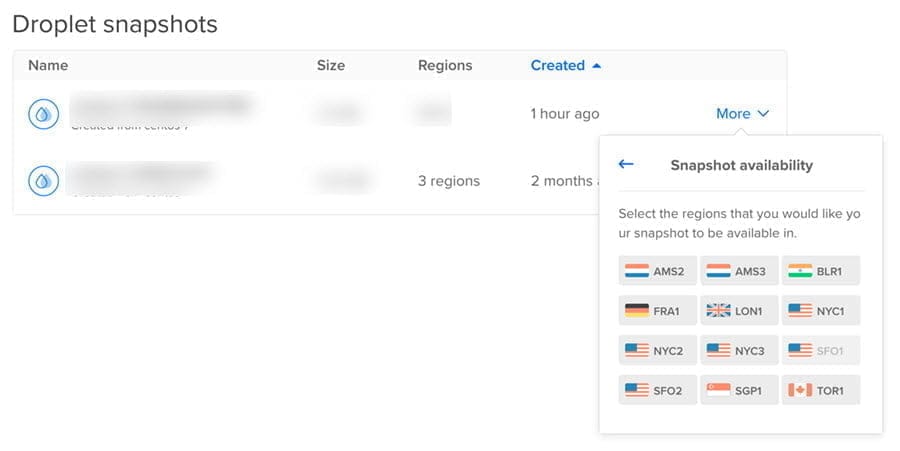
To add more regions for your snapshot, open the More menu of the snapshot, and select Add to region from the dropdown menu.
Step 3: Accept snapshot transfer and use it
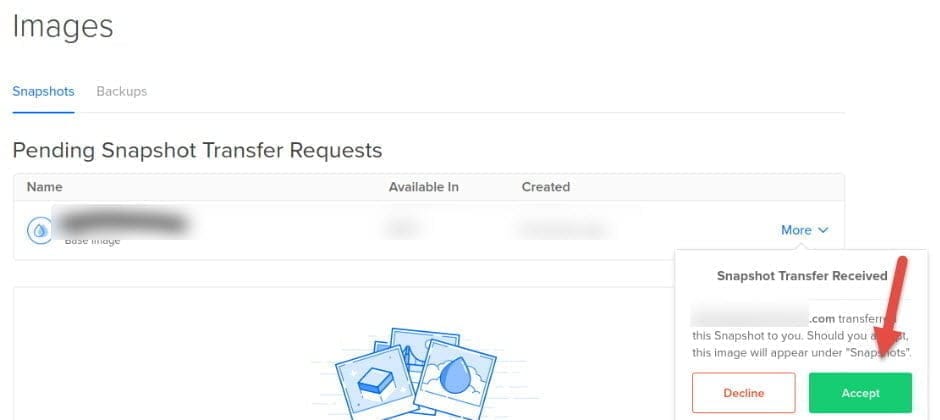
Now log into the control panel of the recipient account, navigate to Images > Snapshots, then you will see the snapshot you had transferred to this user. Click on Accept to complete the transfer process of snapshot.
You can use that snapshot with a new droplet or restore it on an existing droplet. Depends on your case, let see the following guide:
Use snapshot to create new Droplet
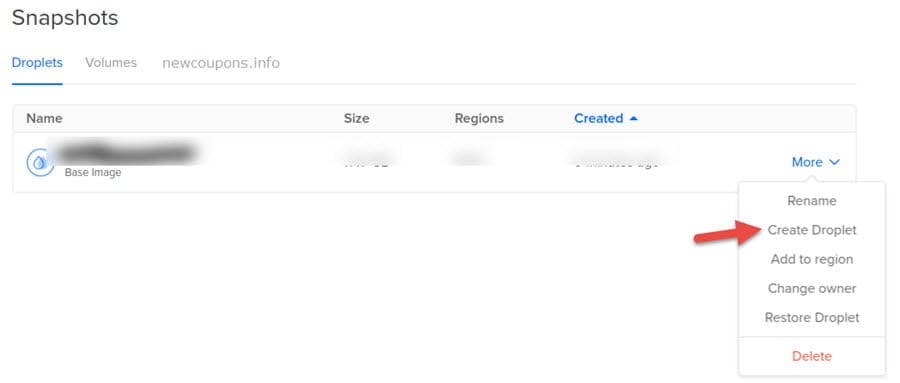
Go to Images and then Snapshots, click More option next to the snapshot you want to use. Click to Create Droplet.
Restore snapshot on an existing droplet
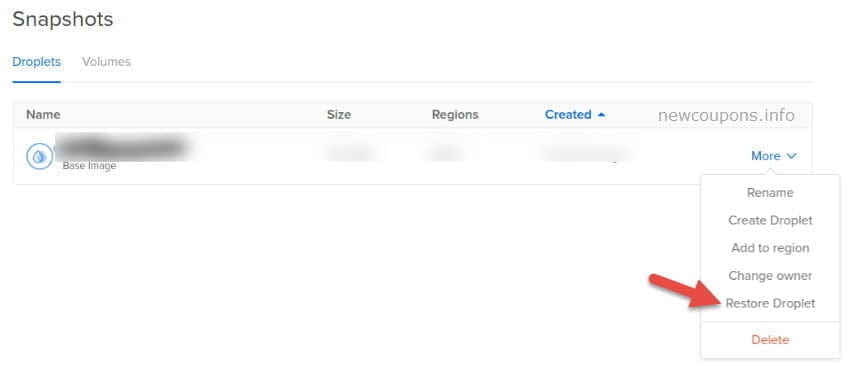
To restore a Droplet from a Snapshot, login to the control panel then click to Images at the top menu. Click the More menu next to the Snapshot you want to restore and click to Restore Droplet.
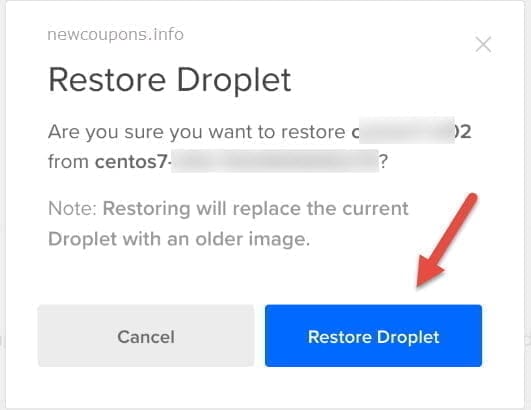
Then click to Restore Droplet button. Once the restoration process complete, the existing Droplet will restored with the selected snapshot image.
Final Words
This is all steps you need to be done for transfer ownership of your droplet to another DigitalOcean account. Especially, if you want to move your website or blog to DigitalOcean, then it’s the high time to do so because you will receive the 100$ free credits on new Signup. In case you have own an account of Digitalocean, you can also use digitalocean promo code to get $15 off on any new droplet.
If you face any problem by following this guide, let me know via the comment form below and we will slove that together. If you liked this tutorial, don’t forget to share it with your friends.
Wish you all succeed 🙂


1 Comment
There is clearly a lot to realize about this.
I believe you made various nice points in features also.