This simple guide will show you how to point your Namecheap domain to a droplet at DigitalOcean. Before getting started, all you need is an existing domain at NameCheap and a droplet at DigitalOcean.

>>> If you don’t have a domain at NameCheap: Register one for up to 98% off.
>>> If you still don’t have Digitalocean’s account and droplet yet: Sign up now and get up to $200 in credit.
Once you’re ready, Let’s get this done!
Step 1: Pointing NameCheap Domain to DigitalOcean.
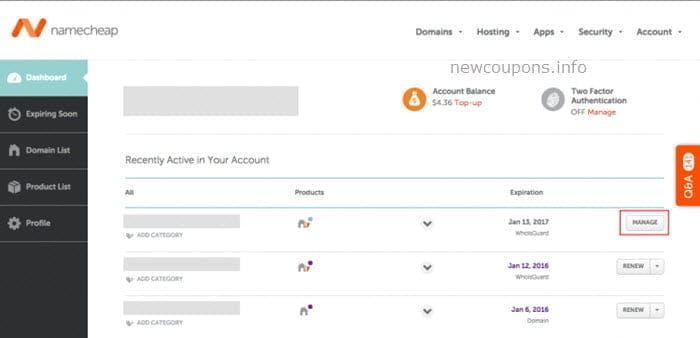
1. Login to your Namecheap account
2. Click Manager next to the domain you want to use.

3. Scrolling to the NameServers section, select Custom, and add the following Digitalocean nameservers to the field:
- ns1.digitalocean.com
- ns2.digitalocean.com
- ns3.digitalocean.com

4. Click on the checkmark on the right-hand side to save your changes.
Step 2: Add NameCheap Domain On the DigitalOcean Control Panel.
To do this step, you must already have a droplet on DigitalOcean. Once you already have DigitalOcean’s account, follow this tutorial to create a new droplet. After completing your droplet, we’ll now assign that droplet to the domain in Step 1.
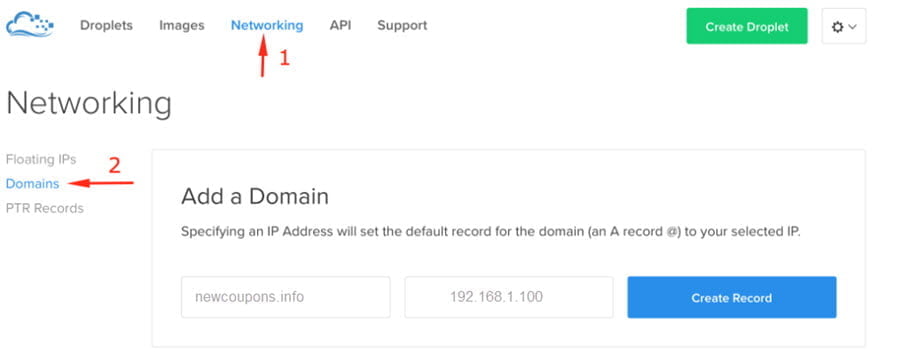
1. Now log in to the DigitalOcean control panel.
2. Click on Networking from the top menu.
3. Select Domains from the left-hand menu, enter your Namecheap domain, and select Droplet IP in the input box.

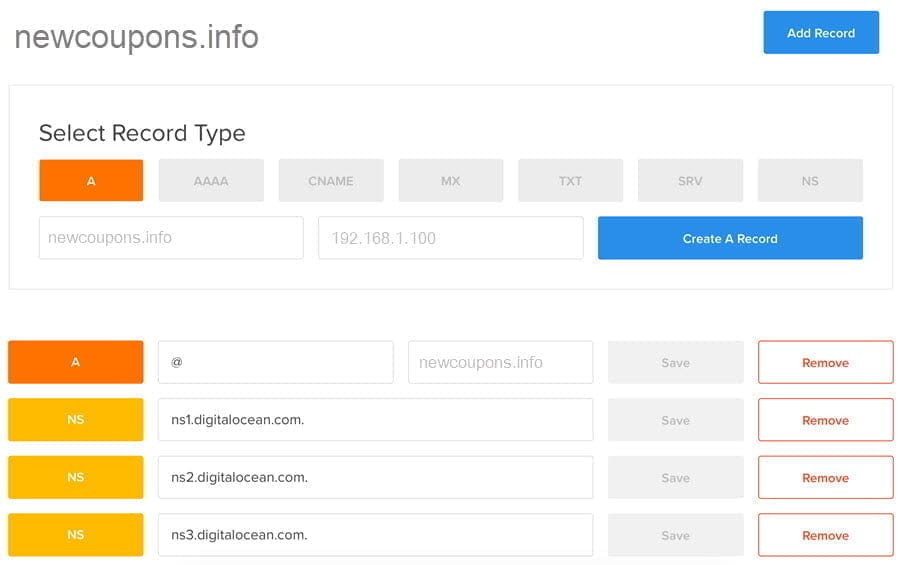
4. Click the Create Record button to add the domain. After the domain is added, you can tap the magnifier icon next to the domain name to see a list of DNS records. It will look something like this:

You’re all set.
Now, you can use who.is to check the DNS records of your Namecheap domain. If it shows all DigitalOcean nameservers (it may take a few hours for them to appear), you’re done.
Similar Guide: How do you point a GoDaddy Domain to a DigitalOcean Droplet?
That’s it!
If you face any problems, feel free to leave a comment below.


